.webp)
.webp)
What’s New
Bookmark this page to see all of Brisk's updates in one place. Every week, new features go live and you won't want to miss them!

Welcome to the New Brisk
July 16, 2026
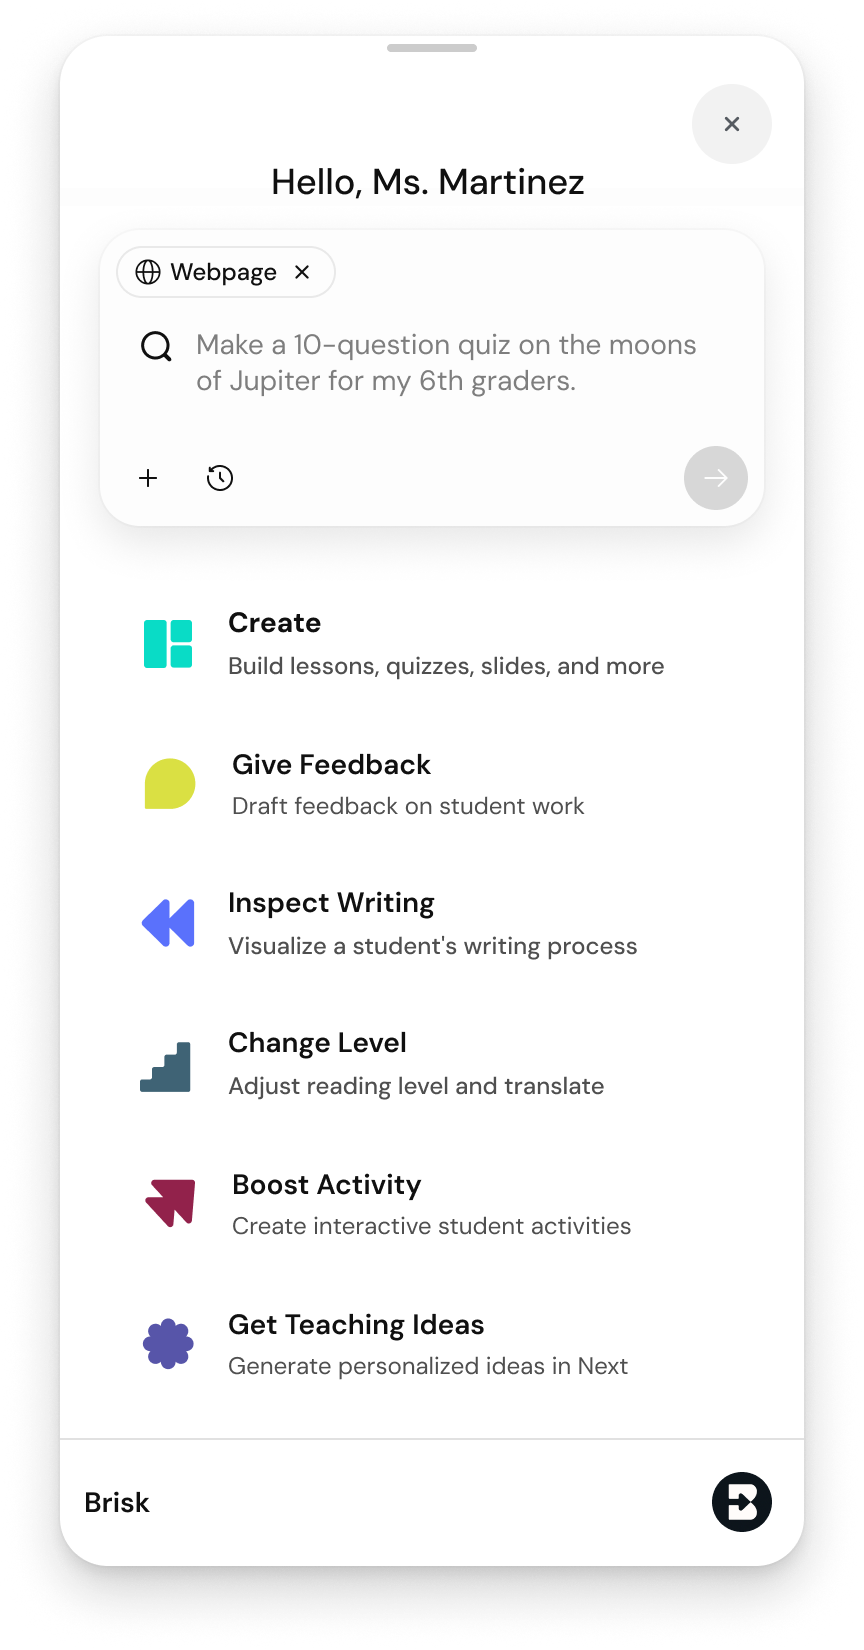
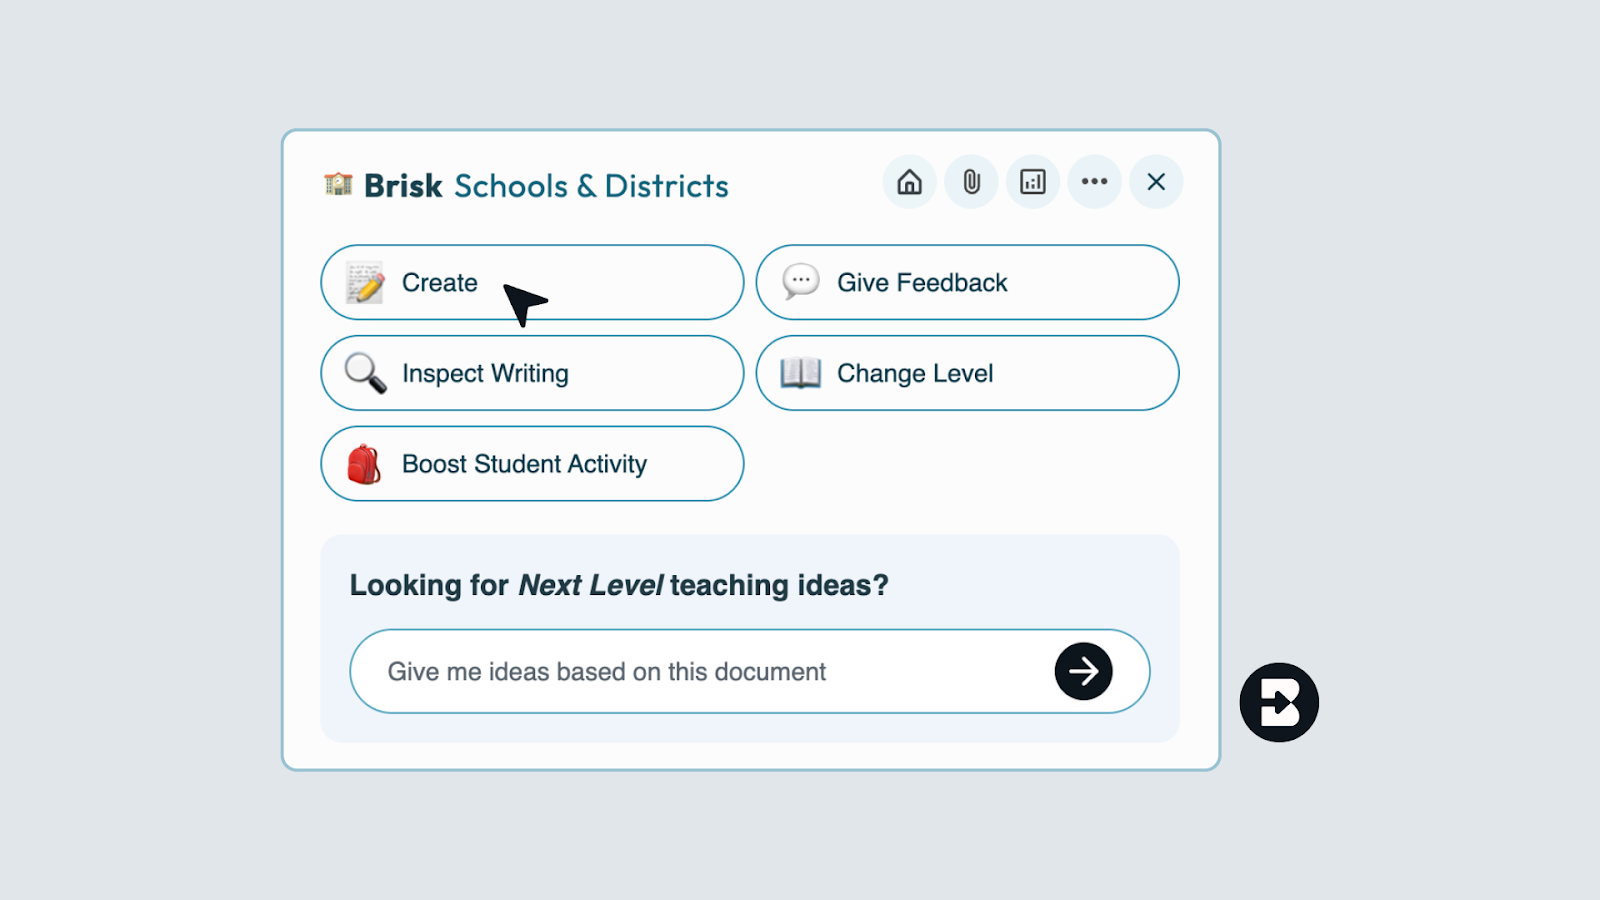
The Brisk extension has a new look, one designed to better support how you work and help you feel prepared for every class, every week, and every school year!
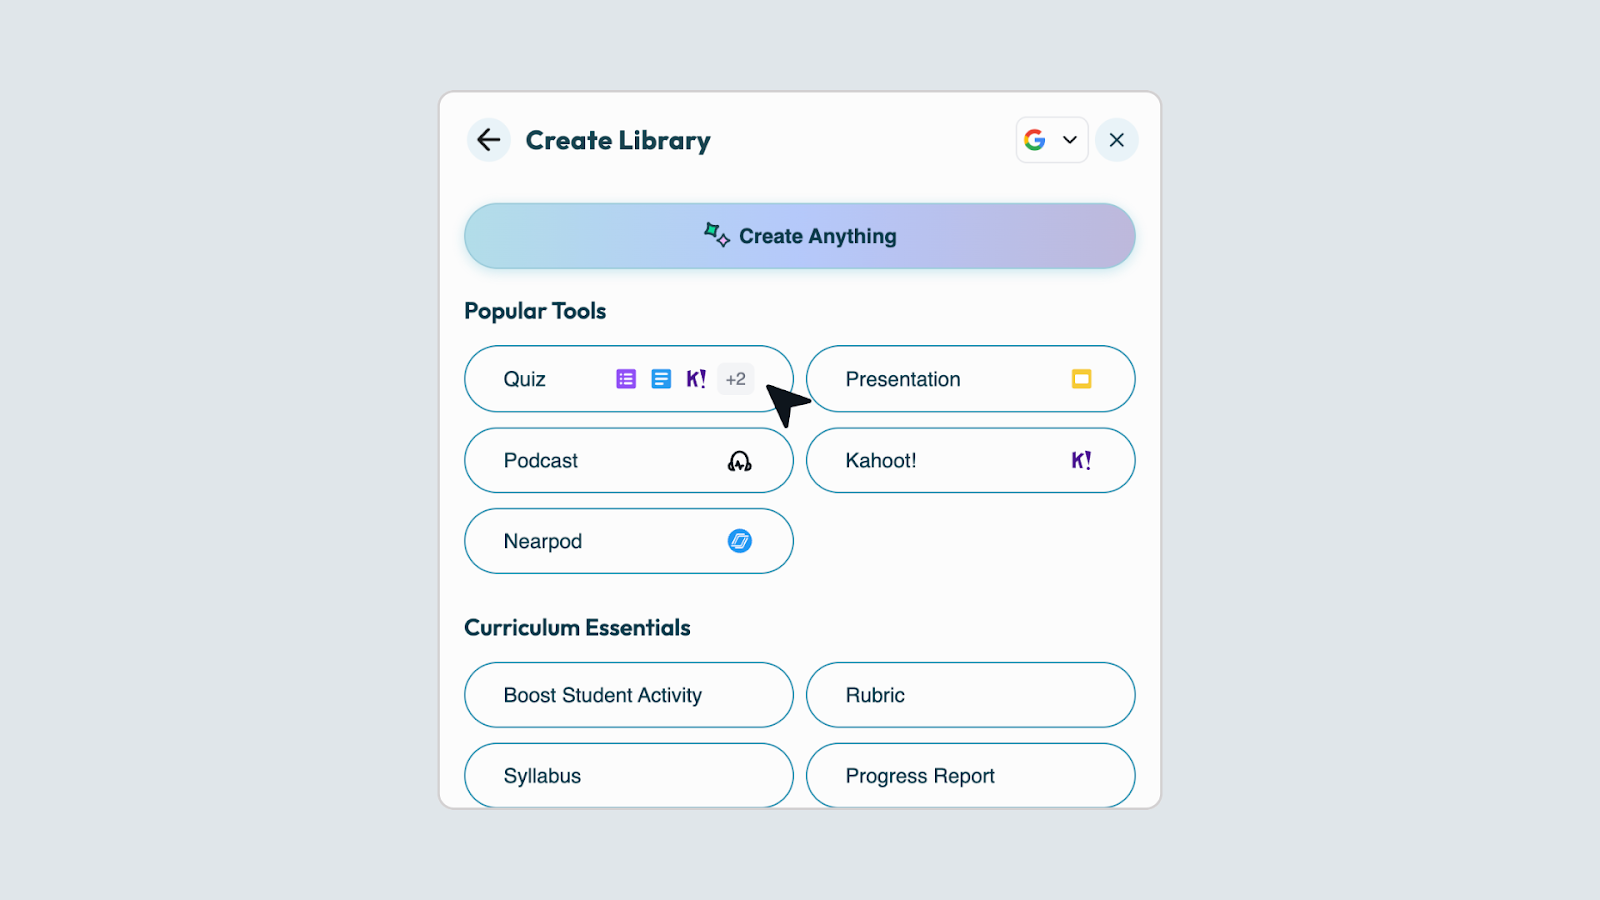
Instead of clicking through menus to find the right tool and then filling out multiple fields, you can simply tell Brisk what you need and it’ll build it. (Don’t worry, you still have the ability to browse your favorite tools if you want to.) From worksheets and quizzes to lesson plans and rubrics, anything you’re used to building with the Create tool is now just a quick conversation away.
How it works:
1. Search for the type of resource you have in mind: Start typing what you’re looking for in the Brisk extension search bar and a list of relevant resource types will appear. No need to remember the proper names of Brisk tools — use whatever words make sense to you and Brisk will figure it out.
(Note that while the new search function will return results spanning all Brisk tools, at this time, only the Create tool will deliver a conversational experience during subsequent steps.)
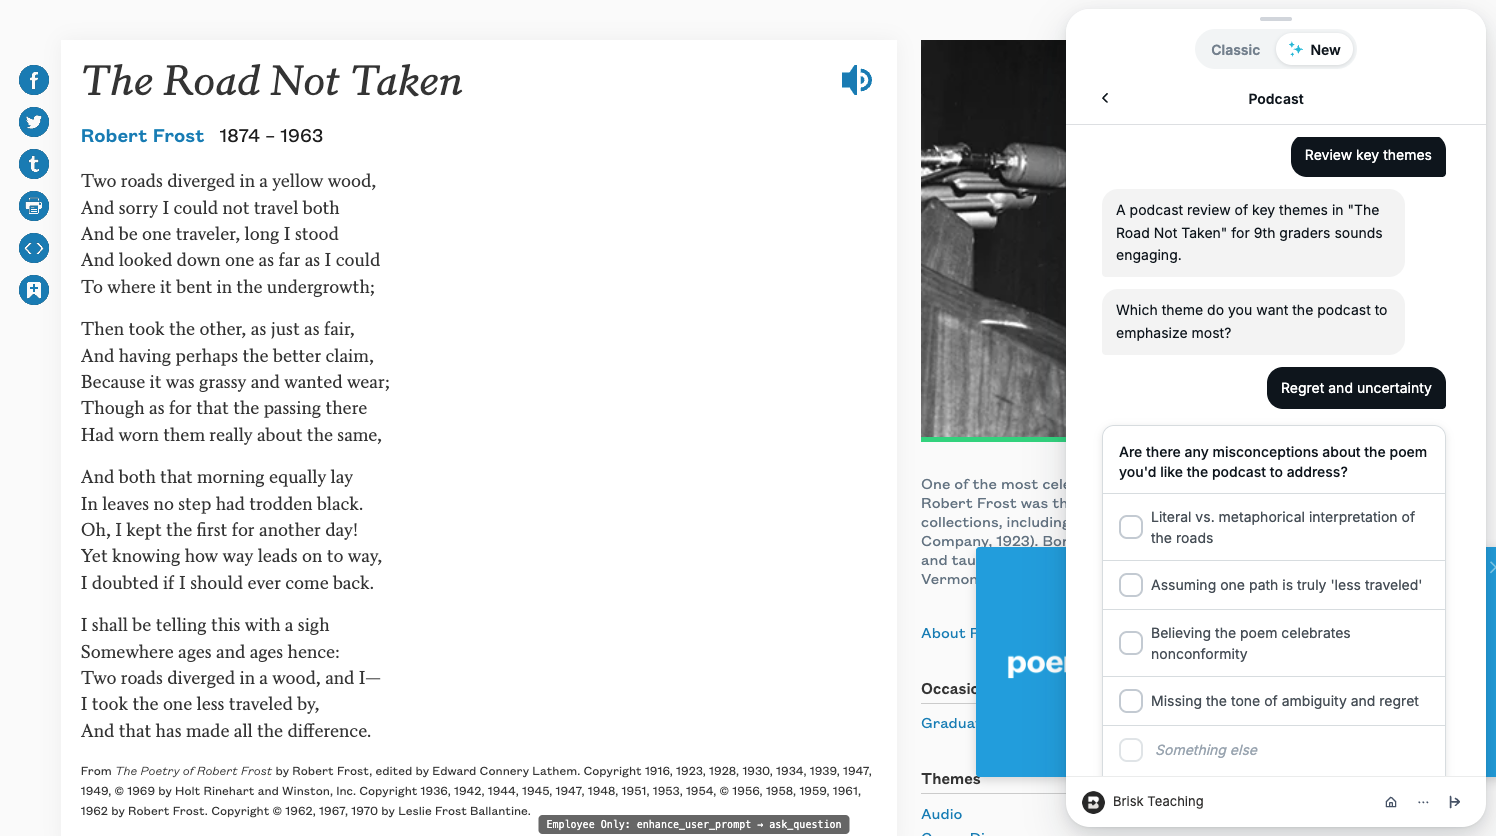
2. Share a few specifics about what you need: In the new conversational experience, Brisk will ask a few quick questions about whatever prompt you provide to make sure it understands what you’re after. Answering these questions is optional, but recommended. (You’ll still be able to use the classic Create workflow, too.)
Depending on the context, Brisk’s questions might look like:
- “What’s the purpose of this exit ticket?” (e.g., a formative check after a day’s lesson, a diagnostic before kicking off a new unit, prep for a summative unit test)
- “Are there any misconceptions about the topic you want this resource to address?” (choose from a list of relevant options or type your own response)
- “Is there anything your students have been struggling to grasp about this topic?” (choose from a list of relevant options or type your own response)
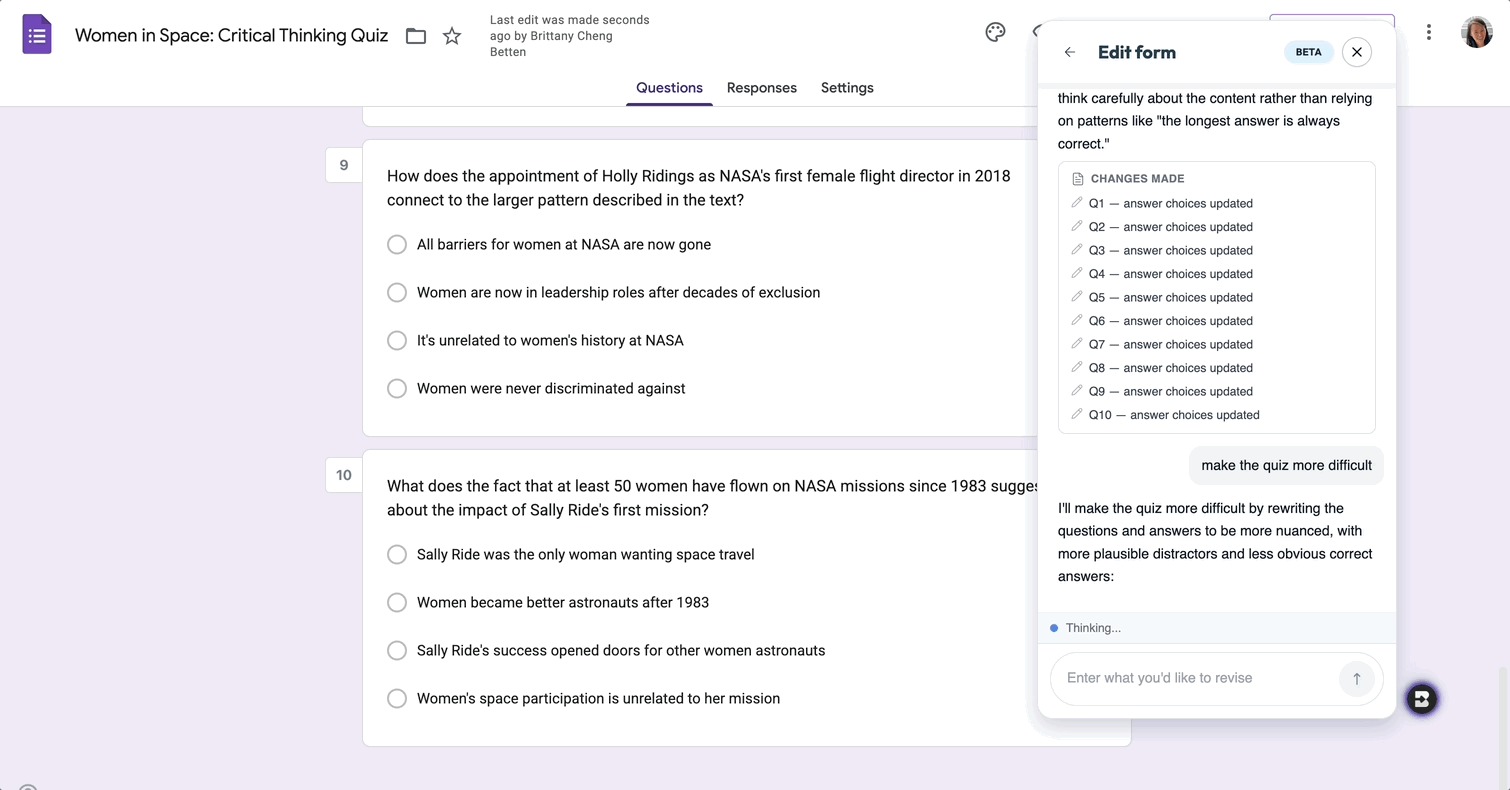
Once you’ve had this brief conversation, Brisk will draw on your responses, your original prompt, your curriculum, and, if your district has Brisk Intelligence, district leader guidance to build a resource that’s fully aligned with your needs and your district’s priorities.
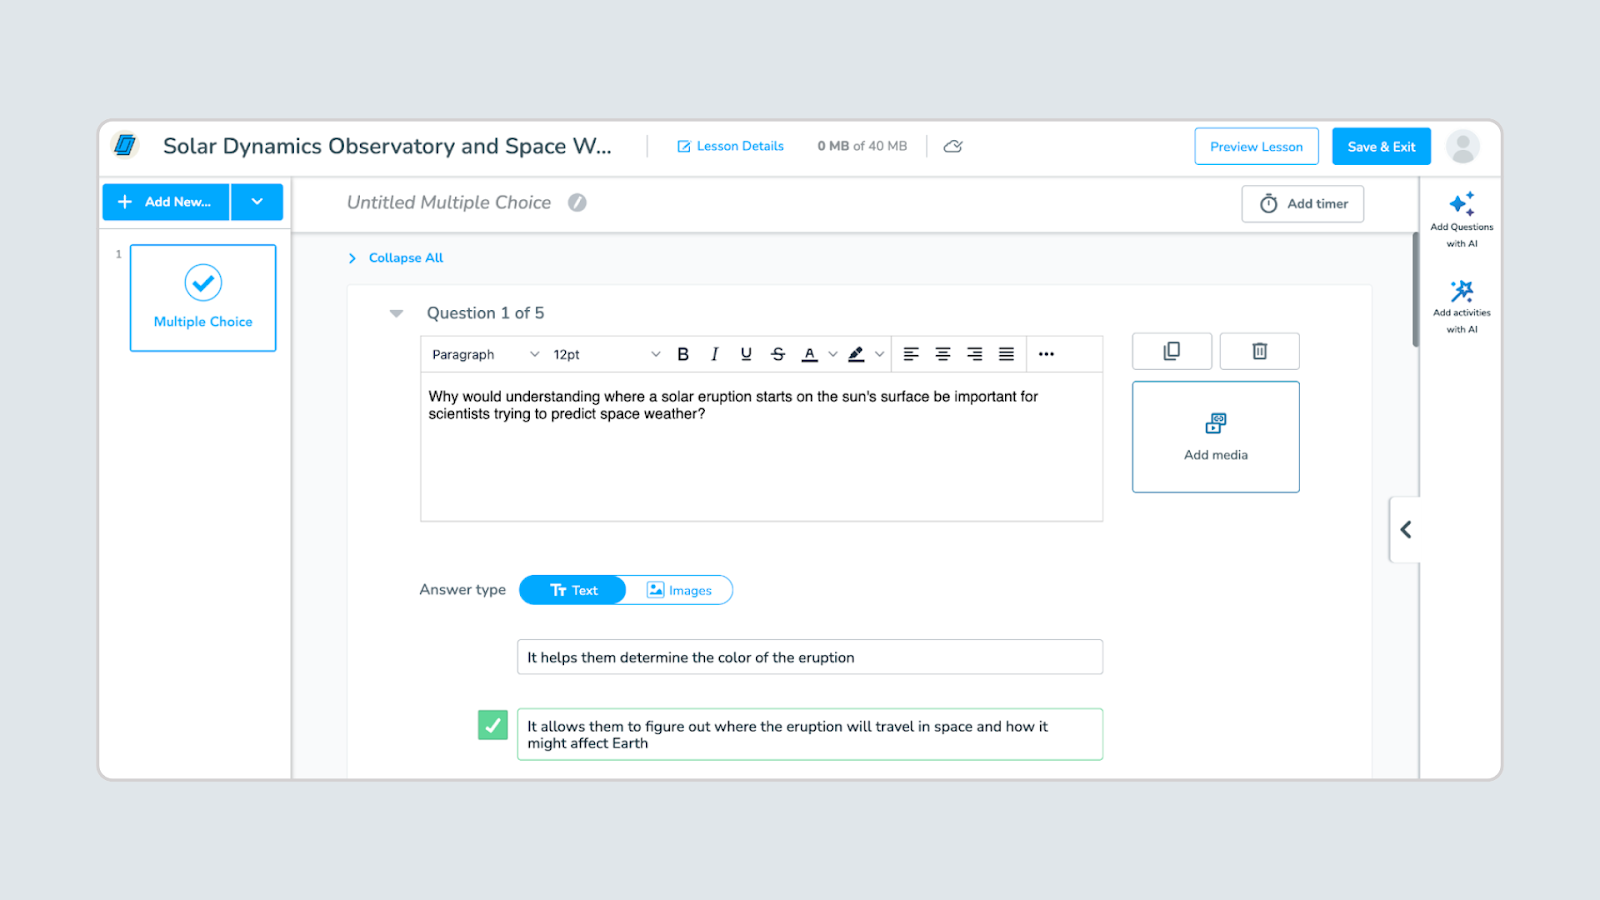
3. Fine-tune the resource until it’s perfect: Chat back and forth with Brisk to make any adjustments to your new resource. As you provide instructions — think: “make this shorter” or “swap the third question for something more challenging” or “add scaffolding for ELL students” — the resource will update right before your eyes. No need to start over or sift through multiple versions.
Read more about the new Brisk, and see the experience in action:
Resources for learning the New Brisk

Use Brisk Tools Directly in Claude
July 14, 2026
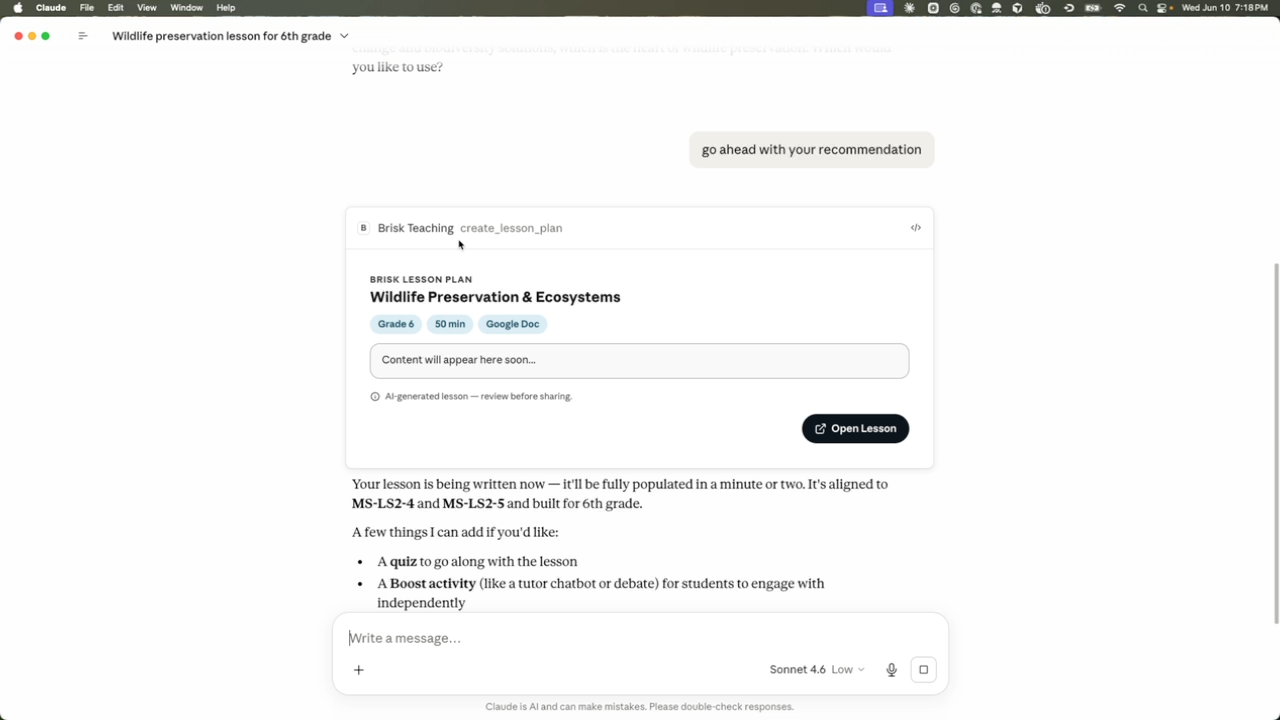
With the Brisk Connector, your favorite Brisk tools are just a sentence away in Claude. Chat with Claude about what you’re working on and it’ll give you ready-to-use links to the types of high-quality instructional materials you’re used to creating with Brisk — no more jumping between multiple browser windows.
What teachers can do in Claude with the Brisk Connector:
- Create Boost Activity: Builds an interactive, AI-powered student activity (tutor, quiz-me, debate, exit ticket, writing coach) complete with learning objectives and guardrails.
- Generate activity ideas: Suggests a set of Boost Activity ideas for a topic — no commitment until you create one.
- Create teaching resource: Creates a lesson plan, quiz, rubric, worksheet, sub plan, or other resource as a Google Doc or Google Form.
- Set up Batch Feedback: Creates an assignment shell for grading a set of student work (you add submissions and run feedback in the Brisk web app).
- List standards: Browses Brisk’s standards database so your materials will be aligned to the right frameworks, grade level, and state.
- Get teacher context: Reads your class names, grades, and subjects (never student data) so Claude can tailor its suggestions.
Connect Claude to Brisk:
- To use the Brisk Connector, you’ll need a Brisk account, a Claude account, and, for any tool that creates a Google Doc or Google Form, a Google account that’s connected to Brisk.
- Open Claude (web or desktop).
- In a new chat, click the + button near the prompt and select Connectors, then click Add Connector. You can also start the process here.
- Use the search bar to find the Brisk Connector and click Connect.
- You’ll be prompted to sign in to your Brisk Teaching account and allow Claude to access it. Click Allow.
- Once connected, Brisk will appear in your list of Connectors and Claude will be able to use Brisk tools directly in your Claude chat.
Inspect Writing & Targeted Feedback in Microsoft Word
June 29, 2026
Microsoft teachers now have access to two tools that enable them to deliver more (and more personalized) feedback to students in less time: Inspect Writing and Targeted Feedback.
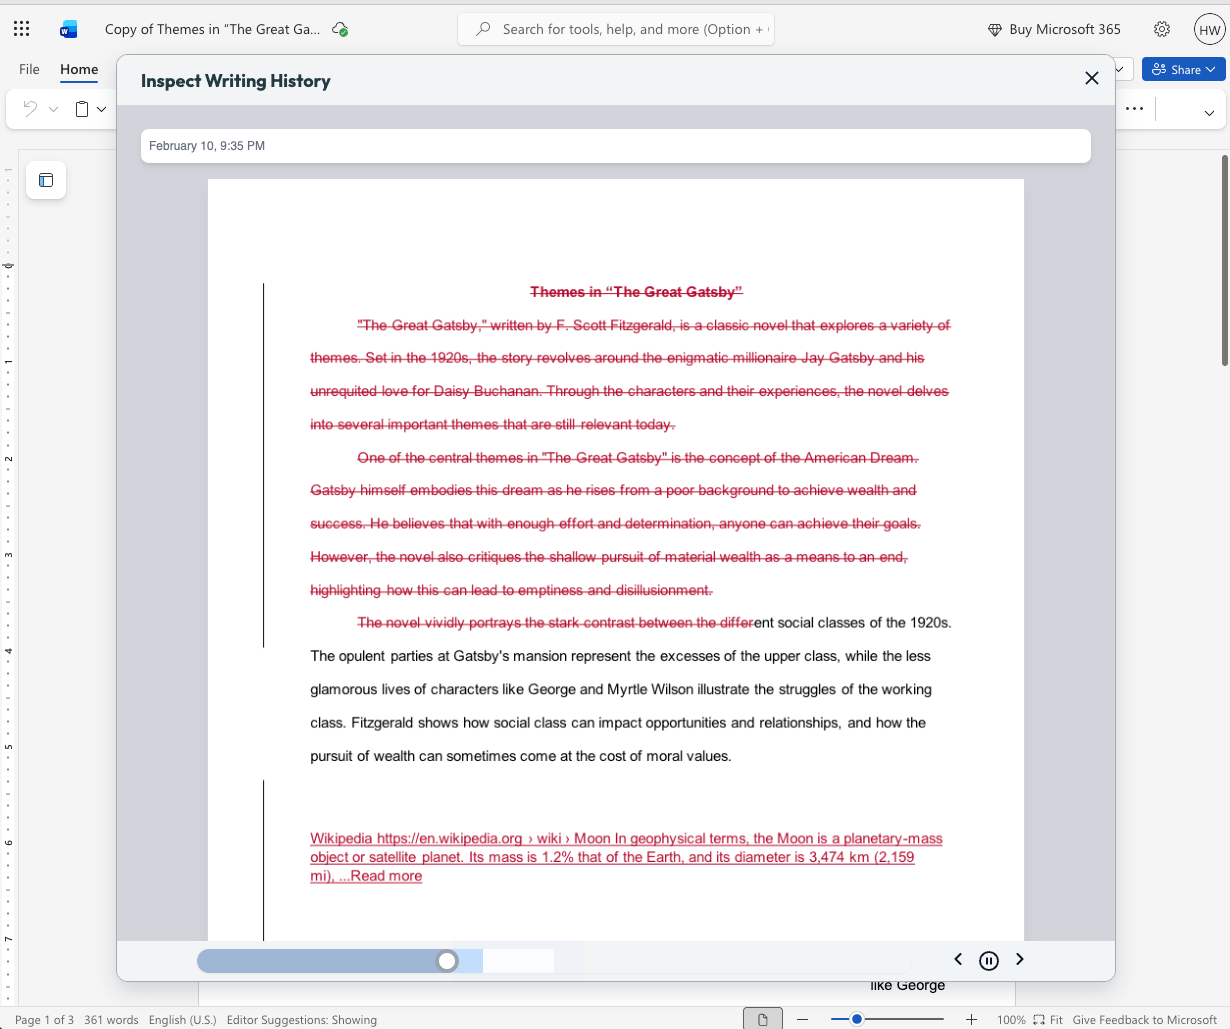
Inspect Writing
(This feature is available upon request.)
Watch a video-style replay of a student’s writing process from first draft through final version. See what they added and deleted at each step and how they responded to feedback. Use this to gain insight into how your students are thinking, spot learning gaps, and guide growth.
Targeted Feedback
Provide students with personalized feedback that appears directly in the Word docs they’re working in. Brisk drafts inline comments that are aligned with your standards and whatever rubric you want, but you remain in full control of what students see.
How it works:
- Open a student writing assignment in Word.
- Select the Targeted Feedback tool in the Brisk extension.
- Set the language and grade level for the feedback and specify whether you want the feedback to align with an attached rubric or your state standards.
- Review the feedback Brisk generates, make adjustments, and click Comment to post a piece of feedback to the student’s work.

Share Boost Activities with Other Educators
June 29, 2026
You can now share Boost Activities with the other educators in your classroom (SPED staff, MTSS coordinators, paraprofessionals, subs). These co-teachers will have read-only access to student progress and activity data so they’re able to observe and support student learning.
How it works:
- Open the Share menu: In My Library, go to Activities and click the Share button or the three-dot menu on any activity, then select Share with Co-Teachers. (You can revoke access at any time by removing a co-teacher from the activity’s Share menu.)
- Enter a colleague’s email: Type their email and send the invite. They’ll receive a link to accept. (To successfully accept an invite, their email must be rostered in your district.)
- Co-teacher accepts: Once they accept the invite, the activity appears in their My Library under Shared with Me.
- Co-teacher views the activity: They see the activity monitor — including student progress, messages, safety flags, and Mock Student — in a read-only view. No edit controls are shown.
You can also share your favorite Boost Activities with your fellow teachers, who can then make copies of the activities to use with their own students.
Shape Every Brisk Output with District-Level Priorities
June 29, 2026
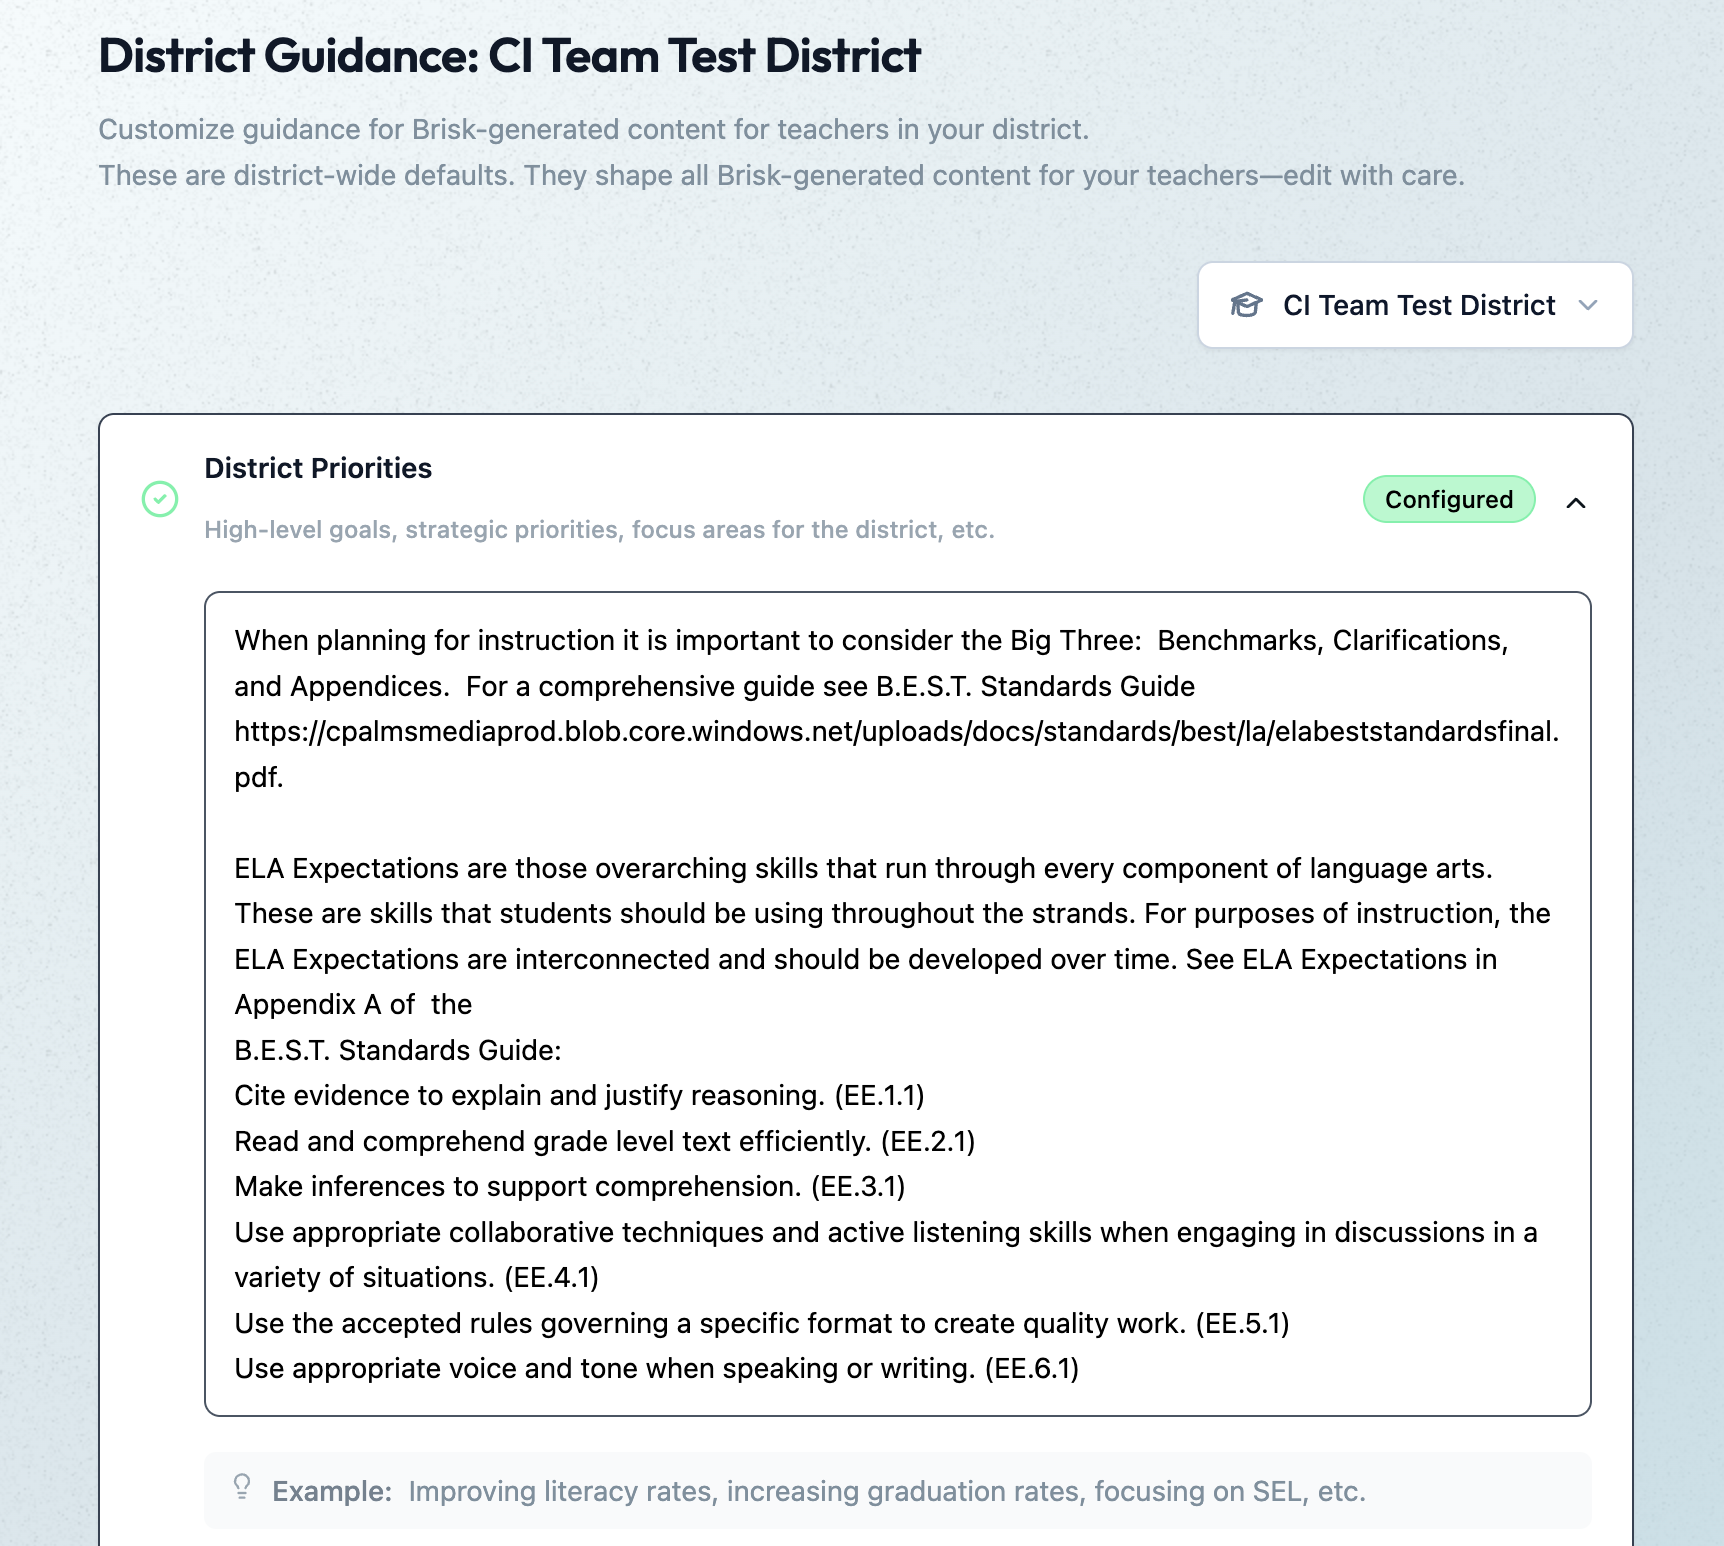
District Guidance gives districts with the Intelligence plan a way to consistently translate instructional leadership investments (professional development, pedagogical frameworks, standards alignment) into actual classroom practice.
In the District Guidance tab of their Admin Portal, leaders provide instructions that automatically shape everything teachers generate with the Brisk extension, Brisk Boost, and Brisk Next. These instructions don’t change the way teachers use or experience Brisk — they simply ensure that every Brisk output reflects a district’s unique priorities.
Leaders can use District Guidance on its own or in tandem with Curriculum Intelligence. (Reminder: Curriculum Intelligence ensures that every Brisk output reflects a district’s adopted curriculum, scope, and pacing.) While Curriculum Intelligence informs what is being taught, District Guidance informs how it’s being taught.
Leaders have the option of providing instructions in four categories:
- District Priorities: High-level goals, strategic priorities, focus areas (e.g., “The district is focusing on literacy across all content areas this year”)
- Values & Frameworks: Cultural values, behavioral frameworks, ethical guidelines, community norms (e.g., “Emphasize the district’s four Cs: communication, collaboration, creativity, critical thinking”)
- Pedagogical Approach: Teaching methods, instructional strategies, learning philosophies (e.g., “Use Workshop Model structure: mini-lesson, practice, debrief”)
- Standards Emphasis: Academic standards, curriculum alignment requirements, assessment criteria (e.g., “Emphasize these power standards for 6th grade math”)
(Note: This new feature will become available in July 2026.)
Create District-Level Libraries of Curriculum-Aligned Resources
June 29, 2026
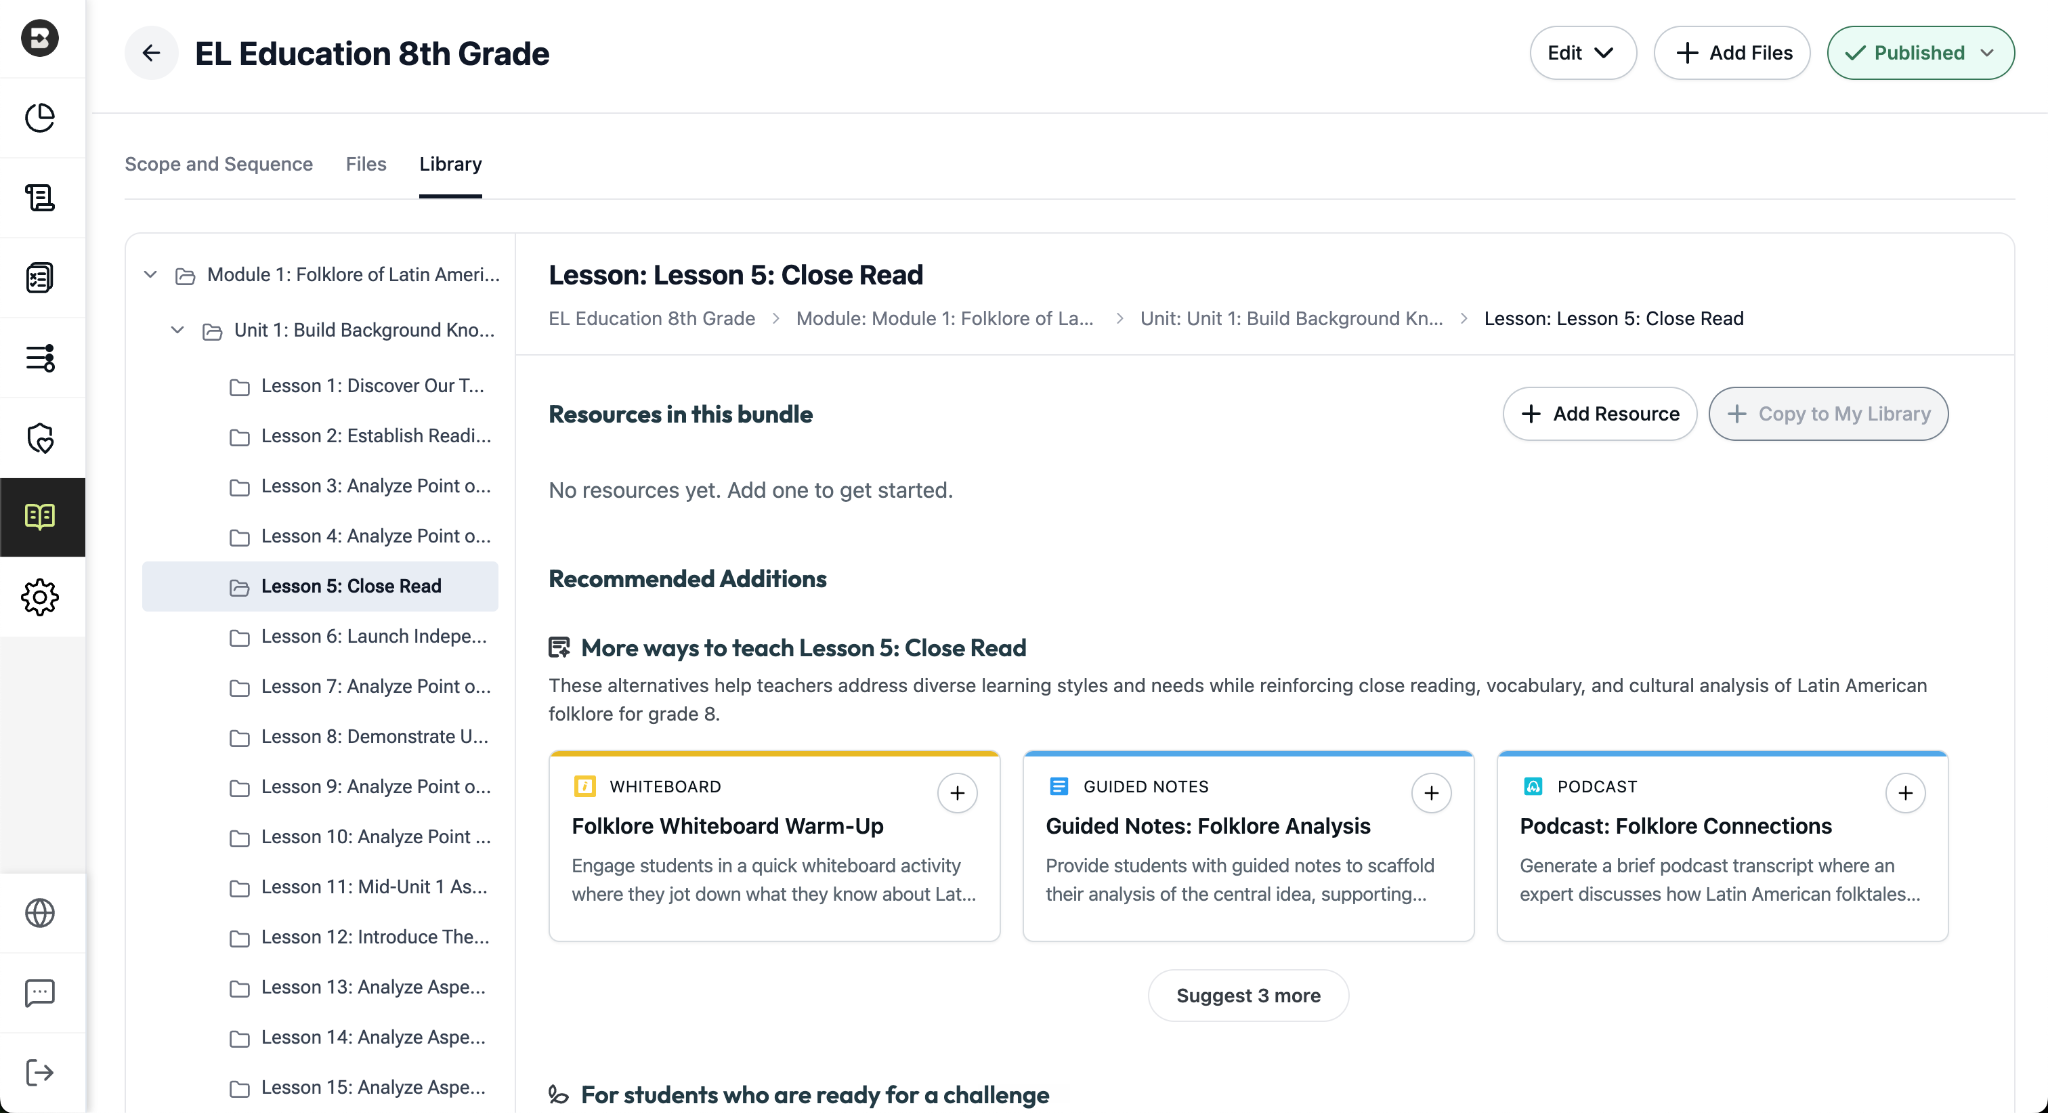
The District Library enables districts with the Intelligence plan to promote curriculum fidelity and help teachers spend less time looking for the right resource and more time delivering high-quality instruction.
Once a district leader has set their curriculum and instructional priorities using Curriculum Intelligence and District Guidance, they’re able to curate resource bundles for any course in their district. It’s like putting a perfectly organized library shelf at every teacher’s fingertips.
How District Libraries are organized:
- One library per course: Leaders can create a resource library for each course that’s published in the Curriculum Courses tab of their Admin Portal.
- One bundle per lesson: Leaders can put together a bundle for each lesson in a course (reminder: within a scope and sequence, lessons ladder up to units, which ladder up to modules, the largest components of a course).
- One source of truth, easy access for teachers: Only leaders can edit or add to a District Library, but with just one click, teachers can create independent copies of a bundle in their personal resource libraries that they can customize and share with their students.
Building a resource bundle
There are several ways for leaders to add resources to a bundle. They can:
- Choose from a pre-populated list of smart recommendations that are informed by the district’s curriculum and instructional priorities. These recommendations are organized into practical categories like “More ways to teach…” (for supporting diverse learning styles) and “For students who are ready for a challenge…”
- Generate customized resources using the dozens of tools that are part of the Brisk extension.
- Upload pre-existing, non-Brisk resources.
(Note: This new feature will become available in July 2026.)
Brisk x AI Platforms
May 18, 2026
You're already in ChatGPT, Gemini, Copilot, or Claude, typing a quick prompt to get something useful before tomorrow. Brisk is already there too, and one click turns that prompt into something you can hand out in class.
Prompt Booster
Start typing in any of these tools and a Brisk It button appears in the prompt field. Click it and your prompt becomes a detailed, instructionally rich version with grade-level framing, standards alignment, and scaffolding strategies built in — so what the AI gives back is classroom-ready from the start.
From there, choose what to do next:
- Add to Prompt: drop the enhanced prompt back into your AI tool and run with it.
- Create with Brisk: open Brisk Next with your enhanced prompt already loaded. Brisk surfaces aligned lesson plans, assessments, presentations, and more — all from that one prompt.
Take Action on Any AI Response
Already have a response you like? When the AI finishes generating, a Brisk button appears below it. Click to send it where you need it:
- Send to Brisk on the web: push the response directly into Brisk on the web, with or without an additional prompt.
- Send to extension: select Presentation, Quiz, Podcast, Tutor, or Create with Brisk to prefill the Brisk Extension. Customize, then create.
Wherever you're already prompting, Brisk works where you work. Learn more.
Brisk Math Editor
April 29, 2026
The Math Editor lets teachers and students insert properly formatted equations directly into Brisk. Type the expression once, and it displays the way it would on paper or in a textbook, keeping the focus on the math itself.
How the Math Editor works
The Math Editor is a built-in equation editor accessible via the √x button. It works across every Boost activity type, in both the setup prompt and the student chat, and styled math renders throughout.
Where to find it
Teachers: Open a Boost activity, then click the √x button in the prompt box. The equation editor opens, ready for you to build and insert your expression.
Students: In the Boost chat and in Whiteboard text inputs, click the √x button to insert math notation in your response.
Device support
The Math Editor uses a virtual keyboard for equation input, so it works on Chromebooks, iPads, and other touch devices. On devices with physical keyboards, students can also type equations directly.
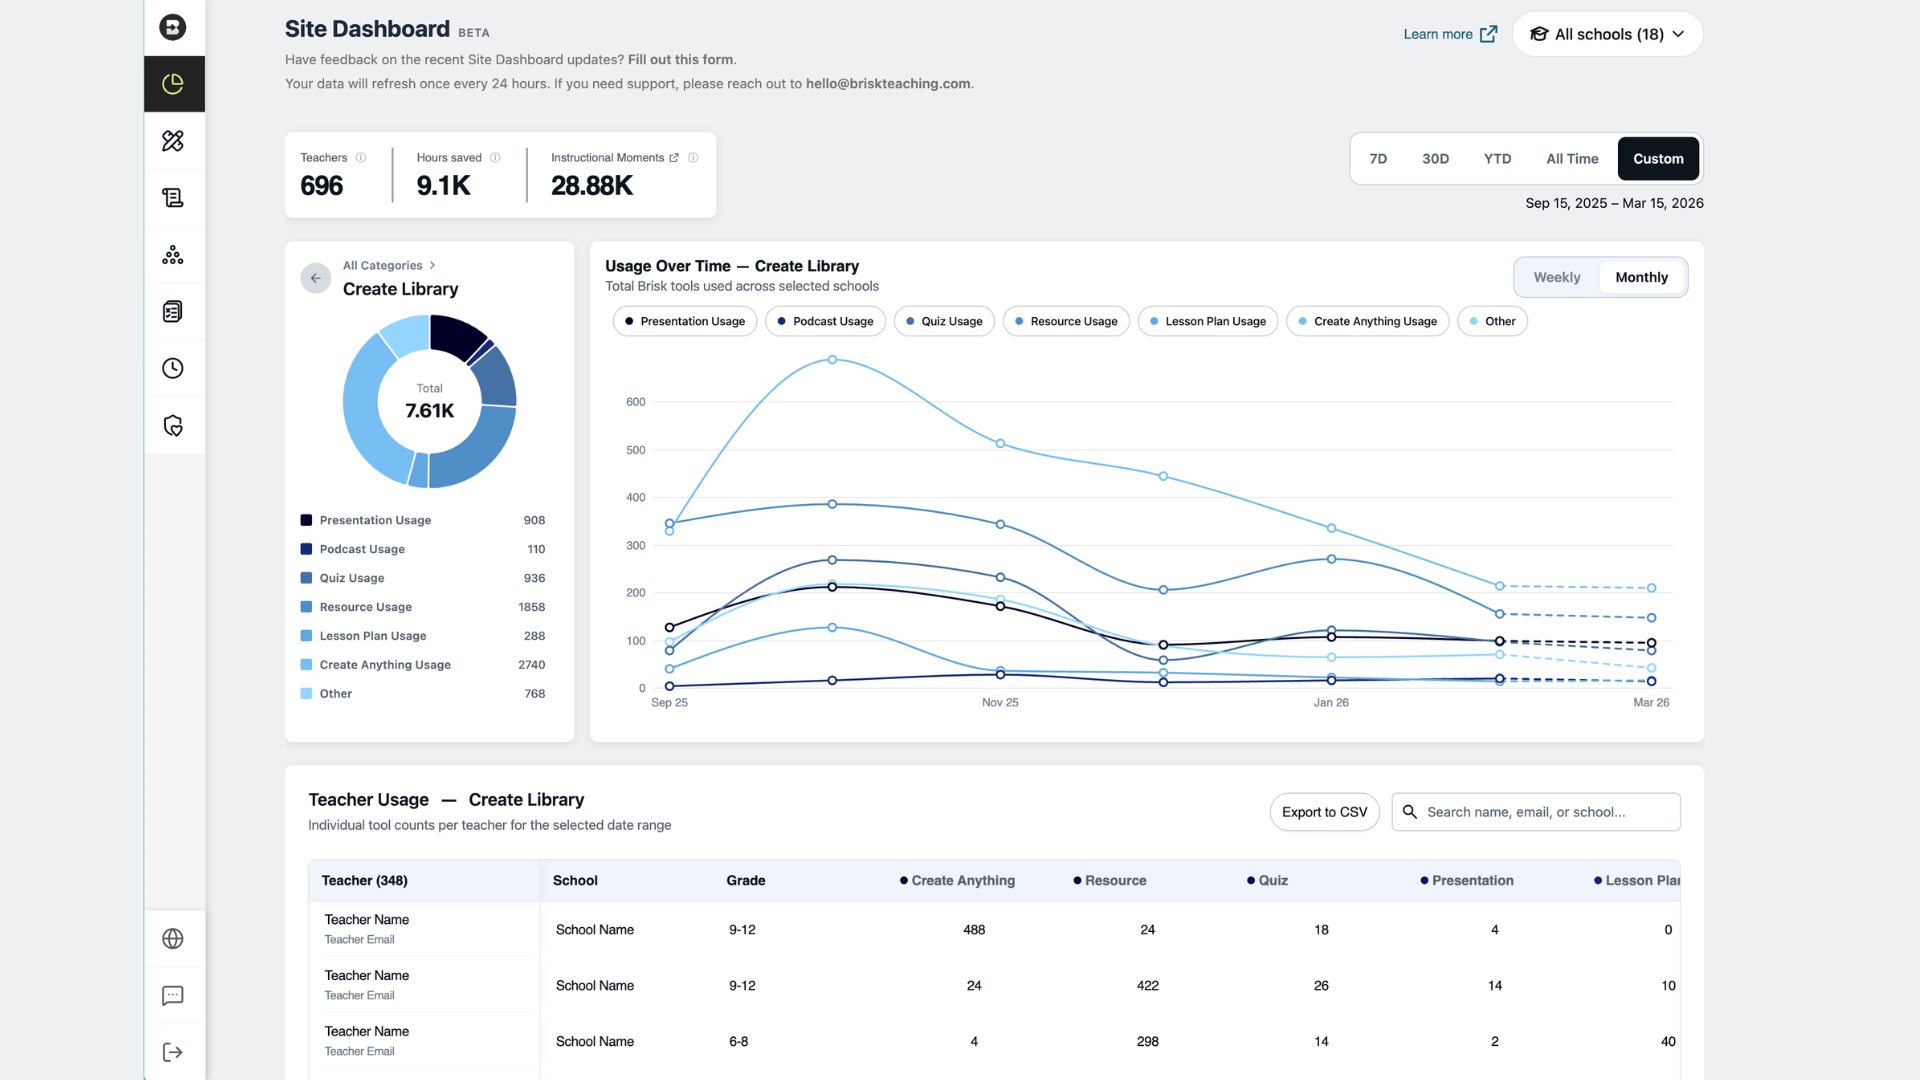
The Site Dashboard Got a Major Upgrade
April 27, 2026
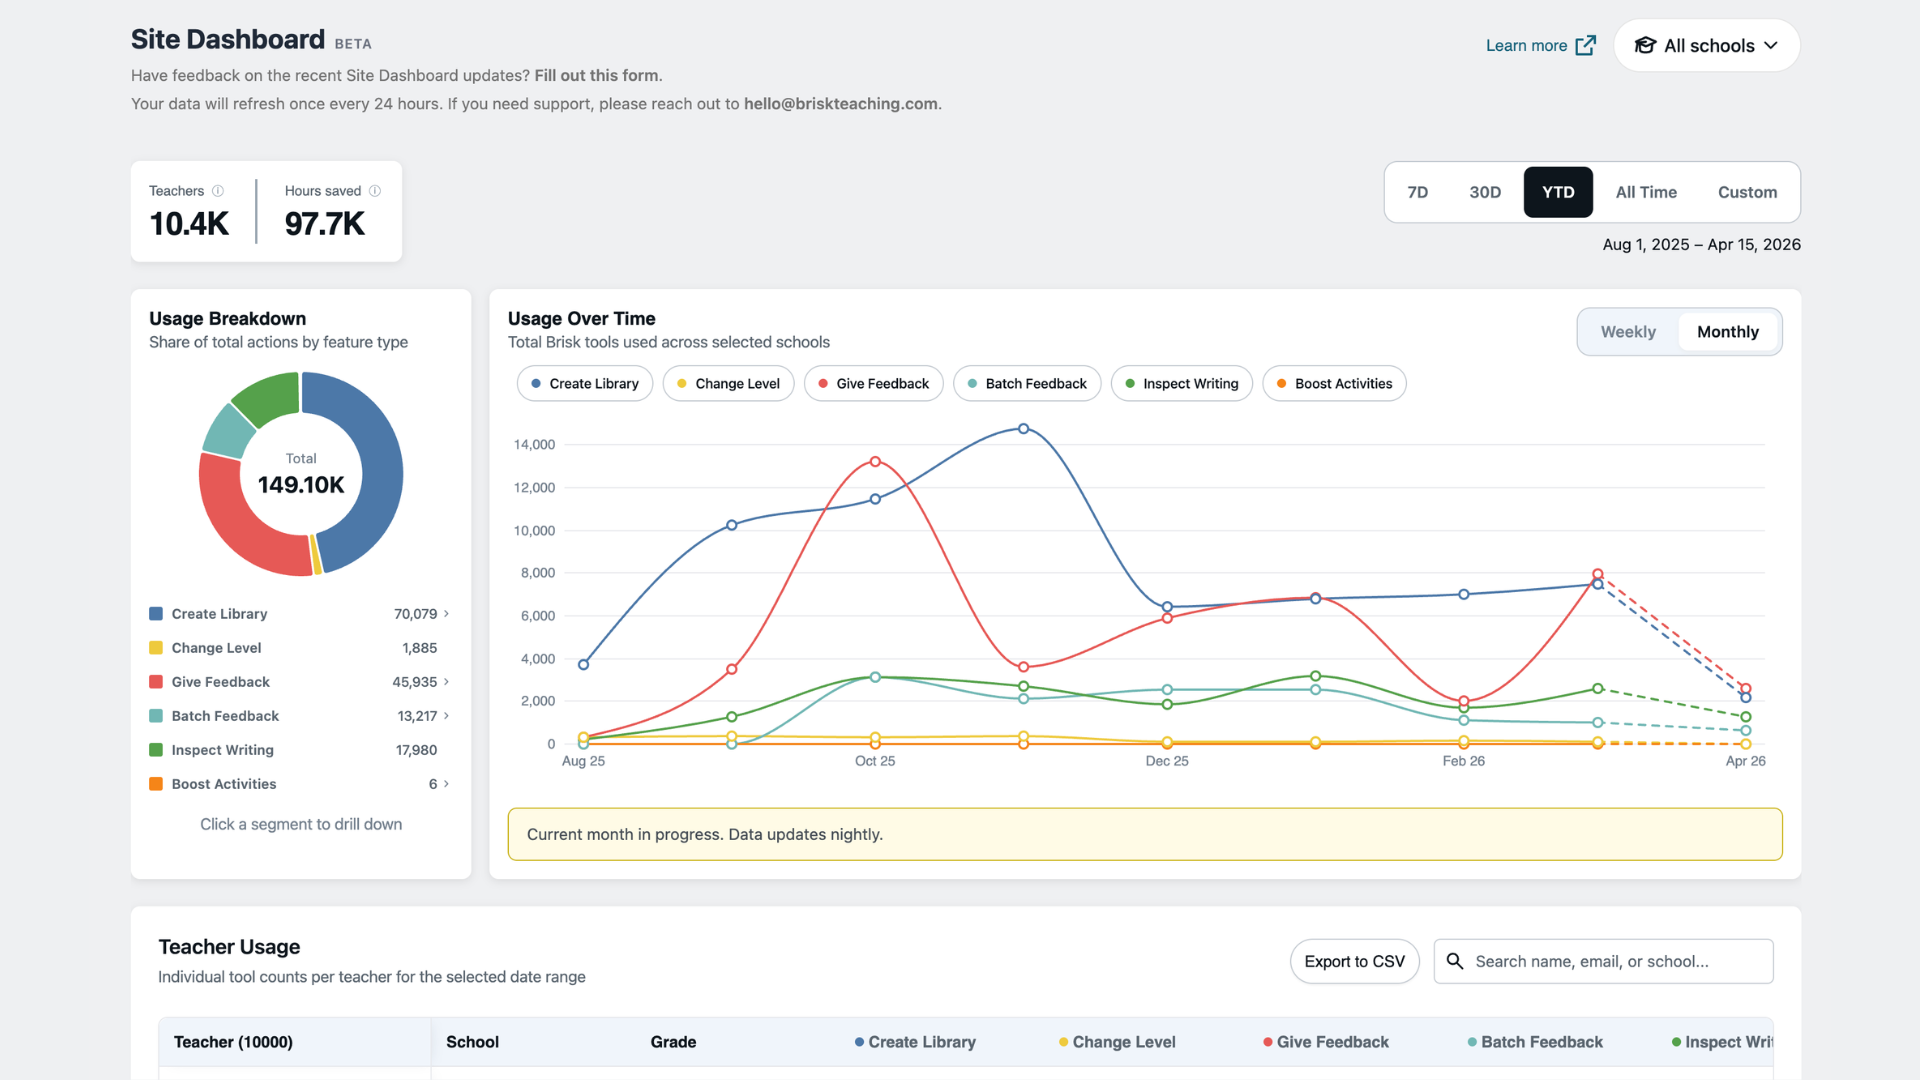
School and district administrators now have a centralized, data-rich view of how teachers across their organization are using Brisk, updated every night.
What you can do in the dashboard
Start at the district level and filter by school or date range to narrow your view. Total teacher count and estimated hours saved appear at a glance, and a feature-by-feature breakdown covers Create, Give Feedback, Batch Feedback, Change Level, Inspect, Boost Activities, and Boost Feedback. Toggle the usage-over-time graph weekly or monthly to see how adoption is trending, then drill into the teacher table to see tool-by-tool usage counts for every teacher on your roster. Search by name, email, or school, and export to CSV to bring the data into a board presentation, department review, or curriculum conversation.
Introducing Instructional Moments
Instructional Moments is a new metric that helps you identify where AI is being used in ways that directly impact students, like feedback, differentiation, and student-facing activities.
A middle school math teacher creates an interactive activity where students practice fraction operations with real-time AI feedback, instead of a static worksheet. That's an Instructional Moment. It doesn't show up in a typical usage report, but it shows up in Brisk's, giving you a clearer signal of where high-impact practices are happening across your schools — not just how often tools are used.
Drill down into tool usage
Clicking into any feature takes you deeper. Select Create and the view filters to show exactly how teachers are using it, from presentations and quizzes to podcasts and lesson plans, with Teachers, Hours Saved, and Instructional Moments updating at the top and a filtered teacher table below. The same view is available for every Brisk feature, so whether you want to understand how teachers are using Give Feedback, Inspect, or Boost Activities, the data is one click away.
Available to School & District plan users with rostered teachers.
Learn how to access the Site Dashboard, or watch a walkthrough of the feature.
Generate Quizzes Directly in Nearpod
April 2, 2026
Teachers can now create curriculum-aligned quizzes in Brisk and have them land directly in their Nearpod account — ready to assign.
How it works:
- Open the Create menu in the Brisk Extension.
- Select Quiz.
- Choose Nearpod from the options dropdown.

- Generate your quiz — it appears in your Nearpod account automatically.
Requirements: You must be logged into Nearpod for this feature to work. If you're not, Brisk will prompt you to connect your account.